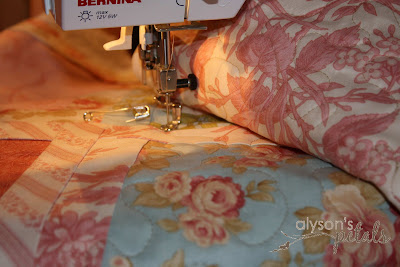
 (a simple and fun tutorial from Alyson's Petals)
This is a great way to whip up a quick quilt when you find a Moda fabric line that you LOVE, and you need just a little bit of every single fabric! This is also a great first quilt for all the new quilters out there.
Quilt Size: Throw, 51"X59"
Fabric Requirements:
Step One: Cutting

You will be cutting each 10 inch square in the Layer Cake. With a rotary cutter and ruler, cut two strips 1 1/2 inches wide off the side of the 10" square. Each strip will measure 1 1/2" X 10".

Turn your rectangle and cut two more 1 1/2 inch strips from the 7" side. These strips will measure 1 1/2" X 7". You are left with a 7" square of fabric.

Group the four strips together and set aside. Set the square in another pile. Continue cutting all of the squares in this manner. You can cut more than one at a time if you feel comfortable with a rotary cutter. (5 or 6 at a time works well)
 Step Two: Swap and Assemble
Now here's the fun part! Grab a square and a contrasting set of strips (different color, different pattern). We are going to sew them together to make a 9" block.

 Take the 7" strips and sew to opposite ends of the square. Always use a 1/4 inch seam. Press seams to the outside.


Next, sew the 10" strips to the other sides. Again, use a 1/4 inch seam and press seam to the outside. You will have overhanging fabric, that's OK.

Continue framing all 40 squares with contrasting fabric, always using a 1/4 inch seam.
 Step Three: Trim Squares
Trim the excess off all 40 squares. Your squares should be 9" (or close ;))

Step Four: Arrange Squares
Find a place to lay out all the squares, trying to place contrasting squares next to each other. The quilt will be six squares wide by seven squares long. This process allows your creativity and preferences.
After the blocks are arranged and before sewing begins, make sure the block seams are alternating so that the longer 9 inch framing strips are not side by side.


The photo below shows how the seams will look after everything is sewn together. I am showing the seams that match well, I do have some that are not so neat! Don't worry if everything doesn't match up just perfectly...it is handmade with love (my grandmas taught me that!)

Step Five: Sew the quilt top together
Starting with the top row, sew the blocks together to make a row six squares wide. Use a 1/4 inch seam. Press seams to one side. Then sew the next row together, pressing seams to the other side. Continue sewing the rows together until all seven are finished.
Once the rows are completed then sew the rows together. You may want to use a walking foot for this step to keep the fabric feeding through the machine evenly.
Once the rows are sewn together the quilt top is finished!
Layer, Quilt and BindCheck the links on the side of my blog for great tutorials on how to finish a quilt. I don't think I could explain it better!


You are finished! Grab a book and some coffee and cuddle up...or show all your friends your new project! Stay tuned for a giveaway...

I would love your feedback! This is my first tutorial and I would love to know how I can make it better. Please let me know if you find errors, or if you end up creating your own Simple Swap Squares quilt...I'll post your photos!
Copyright 2009 by Alyson Steil. This pattern is intended for personal use. Do not distribute without permission.
 Thanks for the comments and for sharing your projects. I haven't been very motivated to sew these last few weeks and reading your comments got me excited about all the different things I could be working on! I tried to find all of your blogs and loved checking out all the great ideas.
  So, as I posted last time, I combined all of the initial comments from the tutorial post and the comments from the giveaway post. I made sure to throw in the extra entry for those who mentioned it on their blogs too. I decided to put all the names in a hat and........
 My little helper picked Renee G!! Congrats! I have your email address so I will get your address and get that Aviary Layer Cake out to you! Thanks everyone!


 You will be cutting each 10 inch square in the Layer Cake. With a rotary cutter and ruler, cut two strips 1 1/2 inches wide off the side of the 10" square. Each strip will measure 1 1/2" X 10".
 Turn your rectangle and cut two more 1 1/2 inch strips from the 7" side. These strips will measure 1 1/2" X 7". You are left with a 7" square of fabric.
  Group the four strips together and set aside. Set the square in another pile. Continue cutting all of the squares in this manner. You can cut more than one at a time if you feel comfortable with a rotary cutter. (5 or 6 at a time works well)
 Step Two: Swap and Assemble
 Take the 7" strips and sew to opposite ends of the square. Always use a 1/4 inch seam. Press seams to the outside.


 Step Three: Trim Squares

 The photo below shows how the seams will look after everything is sewn together. I am showing the seams that match well, I do have some that are not so neat! Don't worry if everything doesn't match up just perfectly...it is handmade with love (my grandmas taught me that!)


 You are finished! Grab a book and some coffee and cuddle up...or show all your friends your new project! Stay tuned for a giveaway...
 I would love your feedback! This is my first tutorial and I would love to know how I can make it better. Please let me know if you find errors, or if you end up creating your own Simple Swap Squares quilt...I'll post your photos!
 So, finally back to some sewing. I am very excited because I have been working on my first tutorial! I'll give you a few sneak peeks but it should be ready sometime next week. It is a fun, simple throw quilt for the beginner to try, the experienced person to whip up fast or anyone who loves Moda fabric and who wants to use a layer cake (pre-cut 10 inch squares of Moda fabric).


